Installation Instructions for Ford Powerstroke 6.0L Stealth Module (2003-2007)
Included With Purchase
| (1x) Stealth Module |
| (1x) Wire Harness with Fuel Rail Sensor Connections |
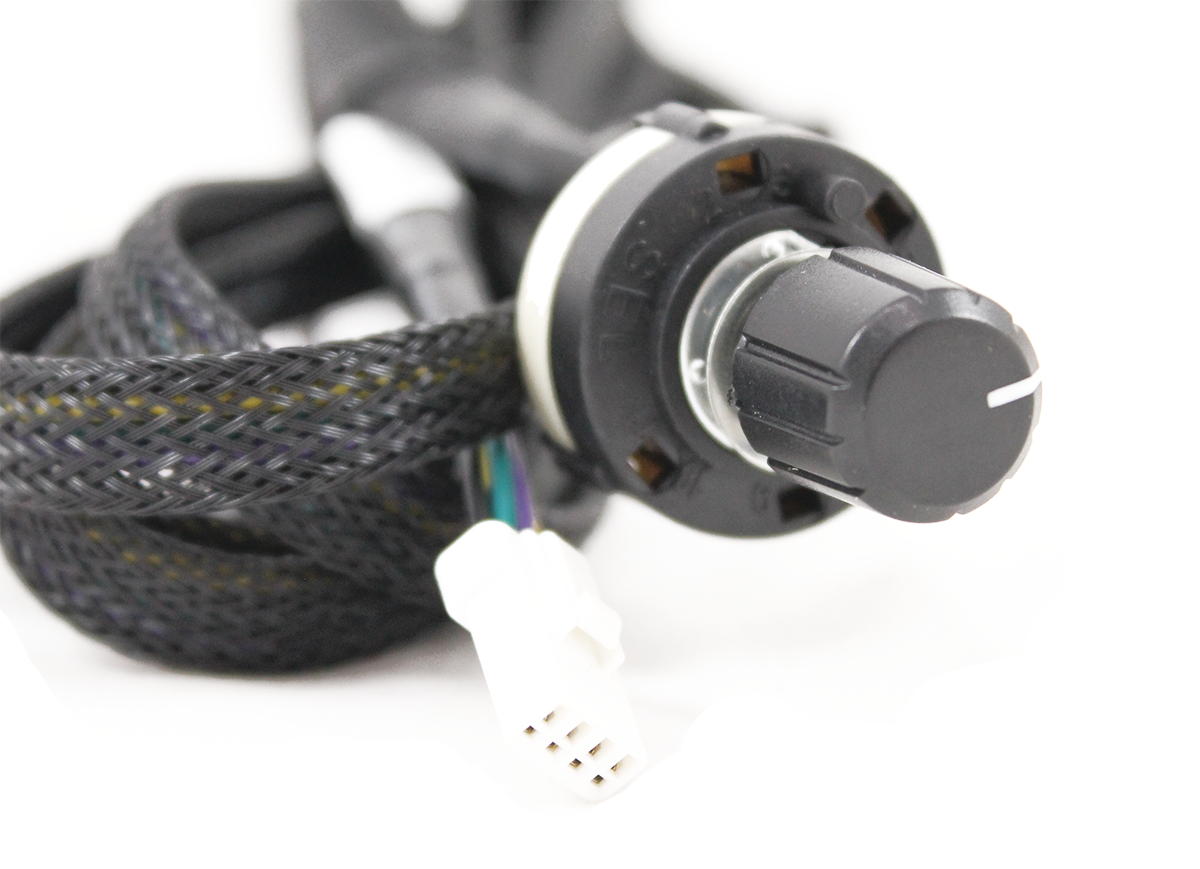
| (1x) Selector Switch |
Module

Step by Step Instructions
Let your truck sit with the hood popped, doors shut and the key fob away from the vehicle for at least 20 minutes. It is important to keep the key fob away and the doors shut during the entire installation process. DO NOT bring the key fob near the vehicle or open any doors until AFTER the module is fully installed and connections are verified. This allows the computer to 'sleep' and for your engine compartment to cool down. Failure to do so will result in a check engine light on startup.
2003 and Early 2004 Installation
|
Step 1: The Stealth Module plugs into the ICP (Injection Control Pressure) sensor located behind the turbocharger and secluded from view by a heat shield. |
|
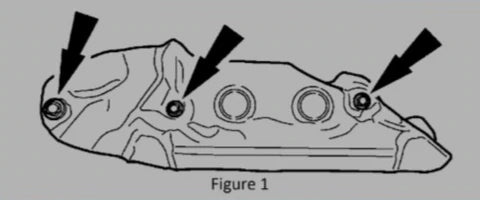
Step 2: Remove the heat shield to gain access to the ICP sensor. Refer to Figure 1. |

|
Step 3: Route the module wiring harness to the back of the engine from the driver’s side top of the engine. |
|
Step 4: Remove the factory harness plug from the ICP sensor. Refer to Figure 2. |

|
Step 5: Plug the module connector into the ICP sensor. |
|
Step 6: Plug the factory connector into the module receptacle. |
|
Step 7: Reinstall the heat shield. |
|
Step 8: Plug the module into the Stealth Module. |
|
Step 9: Plug the selector switch harness into the module harness. |
|
Step 10: Route the switch into the cab of the truck. |
|
Step 11: Attach the module to the driver’s side fender well. Velcro works well. |
|
Step 12: Installation complete. |
2004.5-2007 Installation
|
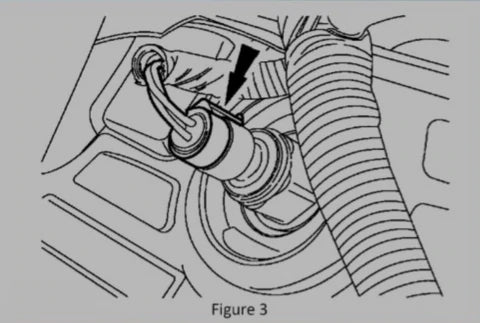
Step 1: The Stealth Module plugs into the ICP (Injection Control Pressure) sensor located on the passenger side valve cover. Refer to Figure 3. |

|
Step 2: Disconnect the factory plug from the ICP sensor. |
|
Step 3: Connect the Stealth Module harness to the ICP sensor. Connect the harness to the Stealth Module. |
|
Step 4: Connect the switch to the module harness. |
|
Step 5: Route the switch into the truck cab. |
|
Step 6: Mount the module to the passenger side fender well. Velcro works well. |
|
Step 7: Installation complete. |


